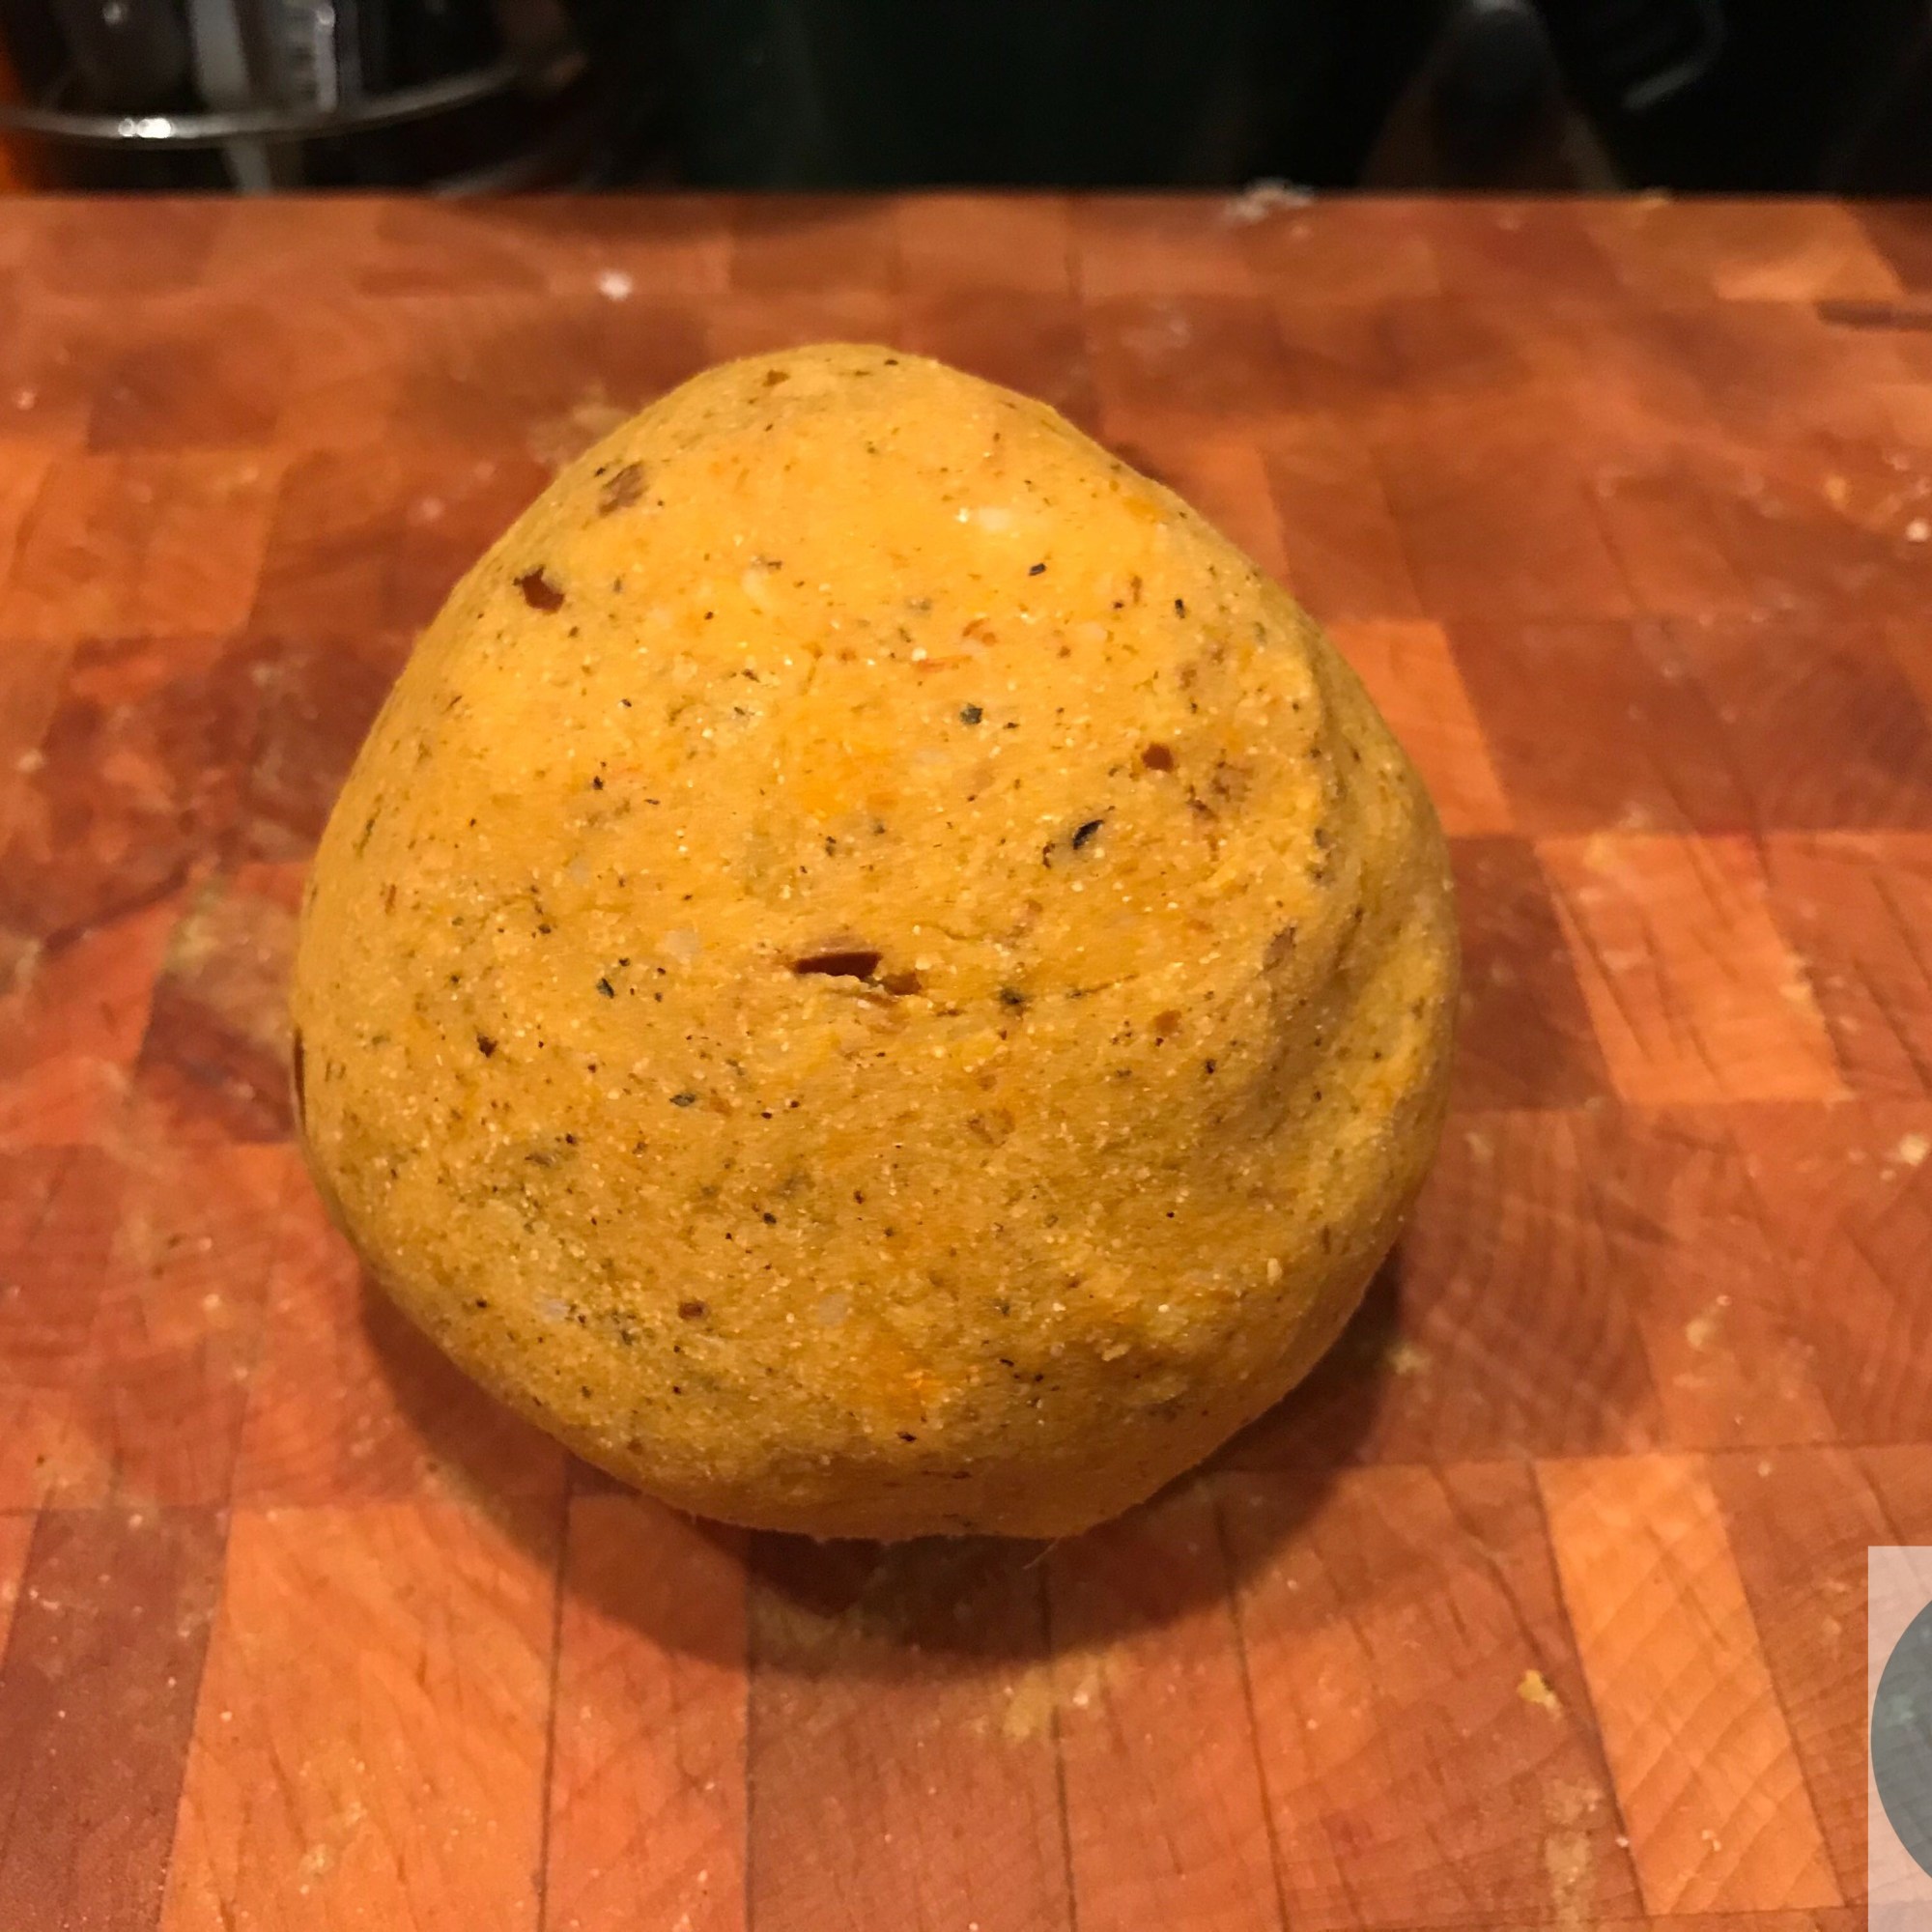
Greek Lamb Pie with Kadhi Crust

Sheldon declared the Greek lamb to be “chewy and …”, on national television, via Big Bang Theory. I took the Nobel Laureate Physicist’s criticism to heart and have been tenderizing lamb with extra loving care 🙂 Here too.

In my version of a classic Greek Lamb Pie, I use some curly kale and cauliflower (instead of rice). I also give a Kadhi accent to the yogurt crust. The one-pot, complete meal turned out fantabulous. Enjoy!

Special tools:

Food Processor.

Ingredients

  • 2.5 lbs (deboned) butterflied leg of lamb, fat trimmed and cut into chunks
  • Marinade:  1/2 large onion, finely diced +  5-6 cloves of garlic, crushed and chopped + black pepper + 1.25 tsp (edible) citric acid + salt & black pepper to taste
  • Vegetables: 4 scallions chopped; 1 cup curly Kale processed; 6 cups of cauliflower processed (or grated)
  • 1/2 cup white wine
  • 1 tbsp besan
  • Kadhi Crust: 3 cups Greek yogurt + 3 eggs + 3 tbsp besan + 3 tbsp mint leaves finely diced + salt & red chilli pepper to taste
  • Topping: 1 cup grated Greek (Kasseri) cheese

Method

Marinade the meat for at least one hour. In a thick bottomed pan (LeCruset) brown the meat. Deglaze with wine and 1/2 cup of water and cook till the liquid evaporates. Add the scallions and the curly Kale and mix well. Add a little water if too dry. Mix in 1 tbsp besan.

Flatten the top, and pack it in with a spatula. Mix all the kadhi ingredients with a wire whisk. Dot the surface with the kadhi-mix. Then smooth it out lightly and evenly with a spatula, till a uniform layer is formed on top.

Bake at 350 F, uncovered, for 30-45 minutes. Check after 30 mins to see if it requires more time- the top should be lightly browned. Then cover and bake for another 20 minutes. The top will puff up. Sprinkle the cheese topping and bake for another 10 minutes.

Let cool slightly and serve hot.

Notes, hints, tips:
  1. 1 average sized head of cauliflower yields 6 cups. Here I use all the 6 cups- that gives a very healthy proportion of veggies to meat.
    But you could use less if you so prefer (4 cups or even 2 cups). If you do use less, you can reduce the kadhi crust to (2 cups yogurt+2 tbsp besan + 2 tbsp mint) and also baking time by 10 minutes or so.
  2. Sheldon will have no complaints about this dish: the citric acid is a gentle tenderizer that is very effective!
  3. You could skip the wine, since the citric acid already gives a light tanginess to the dish.
  4. Of course, you can use your favorite greens and vegetables to augment the meat in the dish.
  5. You can kick it up a notch with aromatic Indian spices or Mexican Oregano.

Lamb with whole grains and yogurt-tahini crust. Almost six years later (14 Dec, 2025) I made a slightly different version of this dish again. Delicious, what can I say!!

The changes to the above were: using kaffir lime leaves (4-5) in the lamb marinade and using 1 cup of mixed grain (for the 1.6 lbs meat) with some baby Bok choy thrown in. Used 1/2 cup white wine and 1 1/2 cup water to cook the grains. With the yogurt topping I mixed in 1 tbsp of tahini + finely chopped mint, kaffir lime leaves and 2 Indian green chilies. I just baked uncovered for 30-45 mins.

I did not cover the meat completely with the yogurt crust that made the dish a little drier than I expected. Good point to keep in mind– I used the Straub pan which has a larger surface area and the thick yogurt (that got even tighter with the tahini) could not cover the whole surface.

Silk Road: Tbilisi Chicken Stew

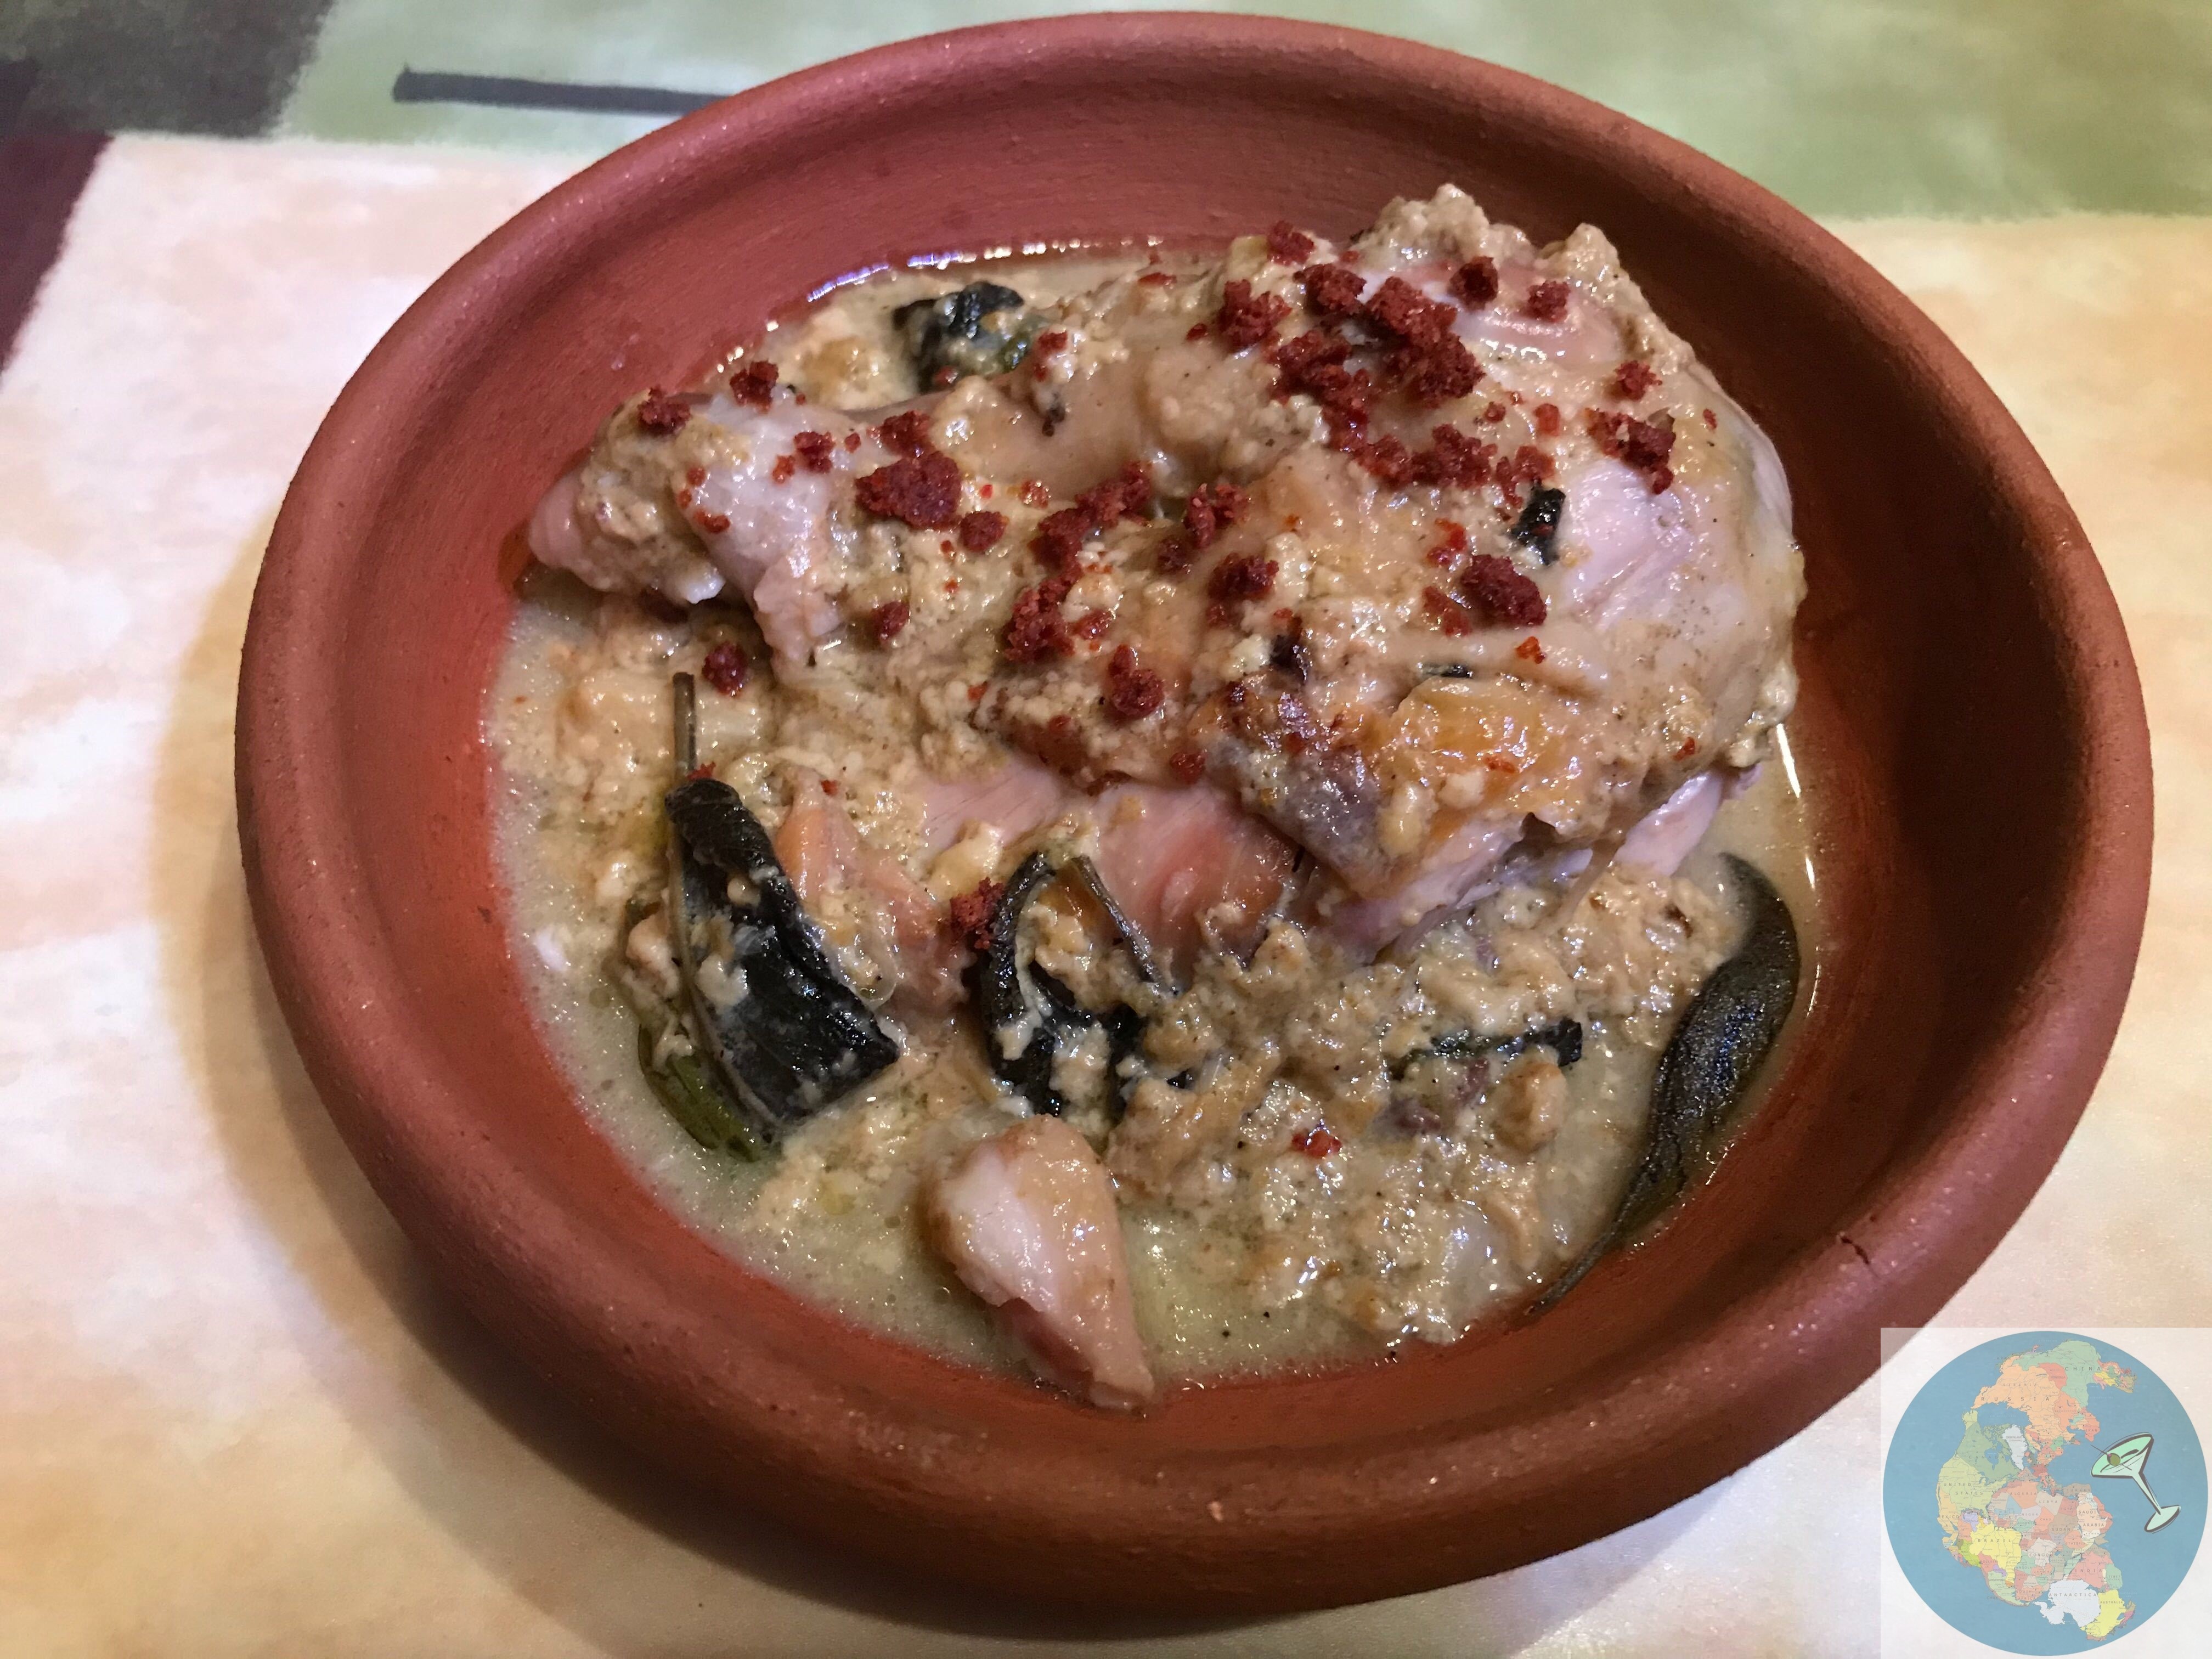
In my recent trip to Tbilisi, I bought a clay baking dish (ketsi) from a subway vendor. We communicated animatedly via miming. Gesturing creatively, she urged me to make chicken in the ketsi (or, so I think!). I also picked up a melange of spices at a street market, from an equally warm vendor whose enthusiastic chatter was translated by her young daughter. This is my homage to the gorgeous Georgian ladies.

Dairy and meat is not a common duo, but inspired by the Tbilisi experience, I present a version of shkmeruli, albeit with some spices (the above street-market spices) and a light, fragrant broth. Enjoy!

Special tools:

Claypot.

Ingredients

  • 3.5 lbs chicken (whole OR thighs on the bone) + salt and pepper to taste
  • Mirepoix: 1/2 cup beet greens, finely chopped, dry roasted, optionally, for about 4 minutes (measures 1/2 cup after processing)
  • 2 cups whole milk + 10-12 garlic cloves crushed,softened in 2 tbsp neutral oil (optional)
  • Georgian spices: 1 tsp Utskho suneli (“foreign” spice or blue fenugreek powder) + 2 tsps kharcho (mixed spices)
  • 10 sage leaves
  • Topping (optional): Georgian Ajika, a chilli-garlic powder

Method

Wipe the chicken pieces dry with kitchen towel and sprinkle salt and pepper on both sides. Brown both sides of chicken in a heavy bottomed pan. If using a claypot, line the claypot with the greens and place the browned chicken pieces on it. Deglaze the heavy bottomed pan with little water and pour on the chicken. If using an enamel iron pot (Le Cruset), add the greens directly and there is no need to explicitly deglaze.

Mix the Georgian spices in milk and pour gently over the chicken. Sprinkle the sage leaves all over the chicken.

Bake covered at 325 F for 1 hour. If not done, remove lid, baste and bake uncovered until interior temp to 165 F. Serve hot with topping.

Notes, hints, tips:
  1. Just a couple of weeks before my travel to the Caucasus, I had experimented with a citrus-milk-chicken stew. In a Baader-Meinhof coincidence I ran into shkmeruli -chicken stewed in milk- at Sakhli, ostensibly one of the top Georgian restaurants in Tbilisi. My version here is slightly different from this classic Georgian dish and I present the citrus chicken below.
  2. If you don’t have Georgian spices, you can substitute with mix of garam masala and coriander powder.
  3. When using chicken thighs, I skin it to reduce the chicken fat in broth.
  4. My Mirepoix: I use dry roasting greens, instead of the classical French technique (eponymous!). Any greens will do- just make sure they are finely diced.
  5. Claypot enables even low-heat cooking; but Le Cruset is a lazier use, since it lets one brown, deglaze and cook in the same pot.
  6. The milk in the stew curdles– providing little cheese curds and a tasty, light broth.
  7. Ajika is reminiscent of the Maharashtrian garlic powder (with chilli, coconut, sesame). Almost all cultures –East Asian to Indian to Mexican– seem to have a version of this lip-smacking, hot, pungent topping.
  • Citrus Chicken: Here is a floral chicken stewed in milk, that is equally gorgeous. Substitute the Georgian spices with:
    Zest of 1 lemon, 2 oranges + 1 orange cut into pieces + 1 tsp ground cardamom + 1/2 tsp ground cinnamon + 9-10 garlic pods, skinned, smashed and softened in 2 tbsp oil
    In fact adding the zest at the end gives a stronger citrus aroma to the dish.

Malwani Chicken: The technique is inspired from above- it turned out like restaurant chicken, but without the oiliness. I used no more oil than the little fat the chicken thighs came with. The artesanal Malwani spice was the high end mix from Mumbai Food Court.
— 1.15 lb chicken skinless, on the bone, thighs. Salt and chilli pepper on both sides. Heat oven-proof calphalon. Add chicken thighs, fat side down to render it. Leave untouched for 1 minute. Then turn the thighs. Add 5 crushed garlic and let it heat till garlic is fragrant.
— Make a mix of 3/4 cup lactose-free skim plus milk (a little sweeter that just skim plus. wonder why) +1 1/4 thin yogurt (made from 1% milk) + 2 tsps Malwani spice mix + salt to taste
— Cook covered at 325 F for 1 hr. Then turn down to 300 F for another 15 mins.

Bengali Swordfish: Does the technique transfer to fish ? Here is the application on a firm-fleshed swordfish. Used the same recipe as above- except used Kalyustan’s Bengal Spice mix and baked at 300 F. Turned out Bengali great!

Honeynut Squash: Easy Petit-Dumplings

Gnocchi is an Italian dumpling made with flour and a mainstay ingredient (usually potatoes) and another usual suspect, egg. Poached in water and dressed in a light sauce, it is an absolutely delicious pasta. Italians, take a bow!

Gnocchi-making takes some expertise. The flour in the classical gnocchi plays a vital structural role for handling and shape-retention (with egg) in the unforgiving boiling water.

I present here a friendly version that you can knead simply, roll, cut and shape. I strike out the egg and cut the flour down to absolute minimum (just enough to absorb the excess moisture). And, just microwave (instead of poaching) to retain the delicate shape of the dumplings. With squash as the only ingredient -and, potatoes as the invisible delivery agent-, the pristine honeynut, with a dab of EVOO, shines. Enjoy!

Special tools:

Food processor; potato masher or ricer.

Ingredients

  • 1 honeynut squash halved lengthwise and the internal pulp and seeds removed
  • 3-4 small potatoes
  • 1/4 cup flour (buckwheat)
  • Seasoning: salt and pepper to taste
  • Dressing: EVOO and sea salt

Method

Place the halved honeynut squash with the cut side up on a baking tray. Brush with EVOO. Roast at 400 F for 30 mins. Run the squash, with skin, in the processor.

Wrap the potatoes in damp kitchen paper and microwave for 4 minutes; peel and mash while still warm, mixing in the processed squash. Add the seasoning and the flour to knead lightly. Cut the dough into four equal-sized pieces. Roll each piece into a rope of 1/2 inch thickness and cut into (roughly) 20 little cylinders. Lightly mark with a fork. Place on a platter and refrigerate till ready to cook.

Cover with damp kitchen towel and microwave 20 at a time for 1 minute. Mix lightly in the dressing and serve.

Notes, hints, tips:
  1. The recipe makes 20 X 4 = 80 gnocchis.
  2. Using buckwheat flour and omitting the eggs gives gluten-free, vegan dumplings.
  3. If the squash is hard to cut, microwave for 2 minutes or so till it just softens enough for the knife to run through.
  4. The skin of the squash will be in bits but not completely pulverized. if you don’t like this texture, you can remove the peel. My recommendation is to use the peel: it breaks the monotony of a smooth texture. Also, the peel has more nutrients than the interior flesh.
  5. I used buckwheat flour, but you can use regular white flour. And, even an egg.
  6. Even just EVOO makes this little gnocchis irresistible. But you could use other elaborate sauces of your liking.
  7. See the Honeynut Squash Mousse, for an alternative treatment. Simple too.

Silk Road: Lavash to Swirly Roomali Roti

Along the Silk Road theme, I present homemade Lavash bread of the Caucasus. Perhaps the precursor of the Indian Roomali Roti (literally, handkerchief bread). [I am sure that the Jewish matzo is a close sibling somewhere on that taxonomy.]

Lavash is traditionally made in a tonir (a tandoor) in Armenia, where the incredibly thin, oval, flat bread is slapped on the inside of an extremely hot tonir and the bread cooks rapidly. A creative chef came up with the idea of using an inverted bowl/kerai/wok to make the handkerchief-thin bread rapidly in the kitchen or even at roti counters at restaurants. I have to research the origin of this ingenious idea, that is so ubiquitous in India.

I must confess that this is a difficult one and requires some flat-bread (roti) making expertise. But if you have some basics under your belt, this is well worth a meditative challenge. It is amazing what just flour and water can produce! In this rendition, I give a swirly take on the classic with activated charcoal.

Special tools:

Rolling pin and board; thick bowl or wok or kerai.

Ingredients

  • White dough: 1/2 cup whole durum wheat flour (atta) + 1/2 cup white all-purpose (maida) flour + salt
  • Black dough:  1/4 cup atta + 1/4 cup maida + 1/2 tsp food-grade charcoal powder + salt

Method

A. It is important that the dough be soft- make each dough with water. Rest them for at least 15-30 minutes, covered with damp kitchen towel.

B. Divide each dough into eight equal-sized parts. Then roll each in your palm of your hand into ropes. If not malleable, rest the dough again to make it so till you can get an even rope of length 10-12 inches. Pair a white and black rope (the black will be slimmer than the white) and swirl into a disk as shown in the pictures. Cover with damp kitchen towel and let them rest for at least 10 minutes.

C. Using plenty of bench flour (white flour), flatten the disk and roll using your pin until the roti is at least 10 inches in diameter. Cover with damp kitchen towel and let it rest.

D. Heat the inverted kerai/wok on HIGH heat- you will be making the roti on the concave surface (not convex!).

E. While the wok heats, for the final “roll” use your hands to slap the roti from one hand to the other, while flipping it (I learnt from the Armenian women –who are primarily the Lavash makers– that you can use your forearm as well while flipping, particularly since the traditional Lavash is large and oblong shaped). When your knuckle shows through– it is thin enough.

F. The kerai must be very hot by now; place the roti on it. Flip after 30 seconds and 15 seconds on the other side. Don’t overcook- then it will harden.

G. Fold into quarters and keep covered till ready to serve. Go to Step E. to make the next roti.

Notes, hints, tips:
  1. You can always make just a white roomali roti. 1 1/2 cups flour (50 % atta, 50% maida by volume) makes 8.
  2. Do NOT destroy any sophisticated (not-stick etc) wok on this. I used a much-beaten, old kerai (that was on its way out) for this and it turned out perfect. Time and over-use had already seasoned it. Resurrected, now it occupies a new, special place in my cabinet.
  3. Flatbread / roti making is usually accompanied by “flour-shower” in the kitchen (haha!) that will take some cleaning-up effort. But well worth the trouble.
  4. Here’s what makes a roti roomali:
    • (a) white flour in the dough to provide the gluten for it to stretch thin;
    • (b) soft-soft dough, but using plenty of bench flour to roll (some suggest to use milk instead of water to make the dough);
    • (c) rest the dough, covered with damp kitchen cloth as often as necessary, and, more;
    • (d) HIGH heat cooking for about 30 secs on each side- as you place the roti on the metal surface, it should immediately start puffing.
  5. Can’t do the air-flipping of Step E: No worries. Roll it thin using the rolling pin. Can’t roll thin: No worries. See the following.
  6. Can’t roll thin enough (or only upto 6-8 inches diameter): No worries. Follow the exact process, but roast for about 45-60 secs on each side. Just before serving, puff it on the open fire (ala Indian phulka). It may not be roomali, but will still be a deliciously soft roti.
  7. In Yerevan, I saw hard Lavash being sold in the markets: the makers and sellers were almost always women. In any case, if you wanted your Lavash soft, they sprayed water on it. How clever!

Lahmacun: In Istanbul I learned the trick of a quick lahmacun with store bought lavash bread. The following filling:bread ratio is more than the usual. But very, very delicious!!
Filling: 1 lb ground lamb + finely diced (1/2 large red onion, 1 tomato, 1 green pepper, 1/2 bunch of parsley)
+ salt + black pepper + red chilli pepper + 1 tbsp EVOO
Use a base of two layers of store bought lavash bread on silpat on baking tray. Divide the filling into four and spread it out on the lavash bread. Brush the meat filling with cold water.
Bake at 500 F for 10 mins.

Silk Road: Charcoal-Grilled Lamb & potatoes

Whether the New World Barbecue or the Silk Road claypit-fire, there is something primal, appealing and heart-warming about grilling.

Inspired by the Armenian khorovats, I give here an absolutely delicious, finger-licking version. In Yerevan, my Armenian friend told me that they don’t use any flavorings to appreciate the natural flavors of meat. Sorry, I deviated. I use an allium-flavoring (onion, garlic) and also a tenderizing element (citric acid).

Special tools:

Metal skewers; bamboo skewers for the vegetables; charcoal grill, oven to roast the vegetables.

Ingredients

  • Meat:
    • 2 lbs (deboned) butterflied leg of lamb cut into chunks (+ 2 lamb chops)
    • Liquify in a blender-  1 large onion +  5-6 cloves of garlic + 1 tsp extra hot chilli powder + black pepper + 1 tsp citric acid [both a tenderizer and gives an acidic tang] OR 1 cup papaya [unripe or ripe, a tenderizer]+ salt to taste
  • Vegetables:
    • 1 lb fingerling potatoes, skewered whole, brushed with some oil
    • Dressing: salt + pepper + finely chopped herbs (cilantro, mint) + juice of half a lemon

Method

Marinade the meat overnight. When ready to grill, skewer the chunks and grill, rotating the skewers every now and then, basting with the marinade, till done. (See here for an alternative to skewering.) Pull the meat off the skewers with Lavash bread (ala Armenian) and serve the meat on the platter lined with the homemade Lavash.

Roast the potatoes in the oven at 400 F for about 30 minutes (turning half way through). When done, pull off the skewers and lightly dress the potatoes to serve.
Notes, hints, tips:
  1. Other vegetables to grill: onions, tomatoes, Brussel sprouts, eggplant, zucchini etc. I skimped here due to some constraints.
    I used bamboo skewers for the vegetables- remember to soak them for at least one hour, so that the dry skewer does not spontaneously ignite.
  2. The grilled chunks are also known by other names: boti/shish kebab (Arab/Indian subcontinent) or shashlik (Russian/Caucasus) or souvlaki (Greek).
  3. The citric acid (food-grade) tenderizes the meat and makes the texture absolutely pleasant. Not chewy at all. Another classic tenderizer is green papaya (usually pulverized into a paste for the marinade).
    Make sure to marinade the meat for at least one hour or overnight if possible.
  4. If you don’t have the means for an open fire charcoal grill, you can broil in your oven with equally delicious result.
  5. I grill the potatoes in the oven, since I found the open-fire grilled potatoes burn before cooking. You can also wrap them in alumunium foil and place on the grill. But I prefer the former method.
  6. The 2 lbs of meat required 4 skewers (each about 17-18 inches long).

Black Lime Chicken Skewers: Finger-licking chicken skewers inspired by Ottolenghi’s Test Kitchen book.
Marinade 1.5 lbs skinless, boneless chicken thighs cut into 1 inch cubes: 3 tbsp black lime powder + 2 tsp lemon zest & 2 1/2 tbsp juice from 2 lemons + 1 tbsp cumin powder + 6 garlic cloves minced + 2 tbsp olive oil + black pepper or urfa biber + salt
Marinade for about 1 hour and the grill till done. Serve with pickled onions (1 thinly sliced red onion in 2 1/4 tsp apple cider vinegar+ 1 1/2 tsp sumac), flat bread or lettuce leaves and farro grain.

Silk Road: Beet-Herbs Stuffed Black-&-White Flatbread

My dream is to go caravenserai-hopping along the Silk Road, savoring the flavors our ancestors deemed worthwhile to share with neighbors. This wish came partially true with my recent trip to Armenia.

I think it is a sacrilege to mess with classic recipes; but I cannot not give a modern twist. So here goes my “black & white” version using a current fad, activated charcoal. The Armenian Jingalov hat -herbs stuffed unleavened bread- is perhaps the precursor to the Indian stuffed paratha. I use here the whole wheat durum flour (atta), instead of white flour. Also in the stuffing, I throw in some golden beet pulp. These turned out scrumptious, barely making it out of the skillet onto the serving platter.

Special tools:

Rolling pin and board; iron skillet.

Ingredients

  • Stuffing: 1/2 cup beet pulp + 1/4 cup each of finely chopped scallions, finely minced mint, cilantro + onion powder + salt + red pepper
  • White dough: 1 cup atta + salt + water
  • Black dough: 1 cup atta + 1 tsp charcoal powder + salt

Method

Make the two soft doughs separately. Rest them for 15-30 minutes. Divide each dough into five equal-sized balls. Take one of white and the black ball– flatten them jointly into a disc approximately 6 inches in diameter. Place about 1/2 loose cup of stuffing in the center. Gather the edges, seal and gently roll thin (about 1/2 cm thick). Use generous amounts of bench flour to make it easy to handle. Brush off excess flour from the bread before cooking.

Notes, hints, tips:
  1. The classic recipe uses only herbs for stuffing; you can use other greens as well. I used the beet pulp — the leftovers from the cold pressed beet juice– since it is dry enough to be a stuffing. You can use the juice for other drinks.
  2. The dough should be really soft to handle. It is better to err on the softer side; since the resulting bread will also be soft.
  3. You can use a dry skillet to cook the bread, or, if you like in a paratha style — to use a little oil on the skillet.
  4. The charcoal powder is food grade, apparently in the superfood category these days. It does not impart any taste– just a black color that you can use to your advantage.